Perks in a quiz
How to set up perks in a quiz
A perk is a file or link the visitor receives for completing the quiz: a catalog, checklist, or guide.
Perks can appear at different stages of the quiz:
- Start page — you can choose which perks to display here
- Questions — conditional perks appear when the visitor meets their display conditions
- Contact form — perks appear under the button
- Thank you page — all perks the visitor has earned are shown
How to set up one or more perks
1. Open the quiz, go to Extensions and enable the Perks toggle.
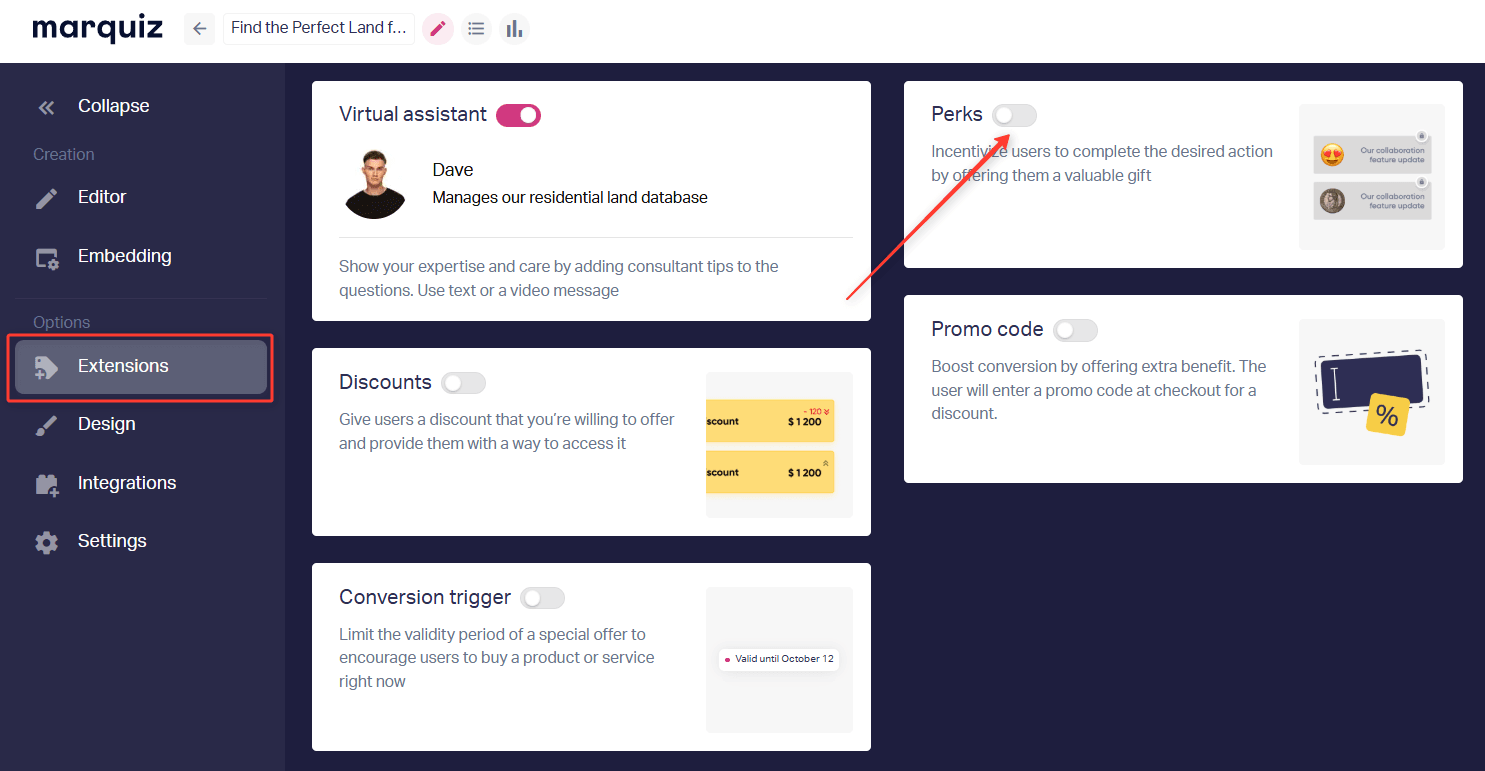
2. Add the first perk in one of these ways:
- enter a link to a file hosted on a website or in cloud storage
- upload a file directly into the quiz
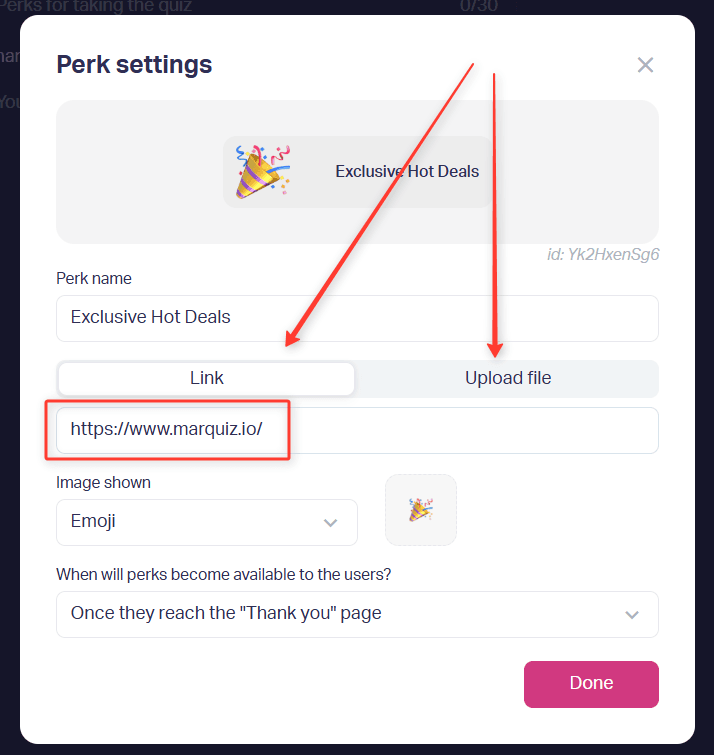
3. If you add a link, make sure the file is accessible to everyone.
4. If you upload a file, make sure it meets the following requirements:
- maximum size — 100 MB
- formats: PDF, JPG, PNG, ZIP, RAR, MP3, WAV, MP4, DOCX, XLS
5. Choose an image for the perk.
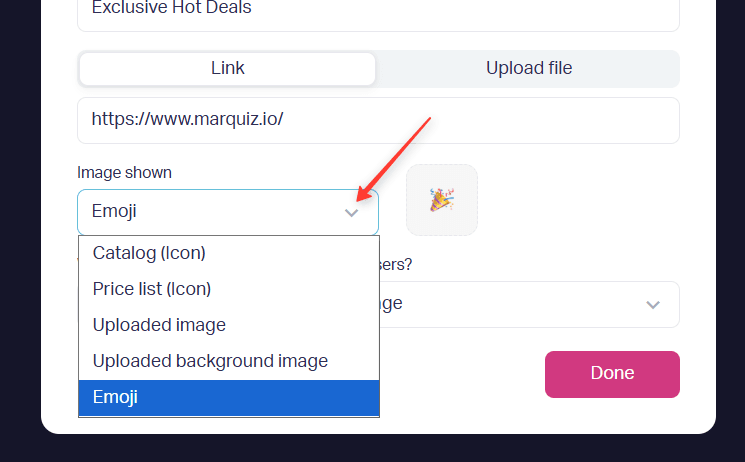
6. Set when the perk will be available:
- only on the Thank you page after completion, if that page is shown after the form
- always — the visitor can open the perk at any step of the quiz, even if they don’t provide their contact information
7. If needed, change the titles of the perk blocks:
- on the Start page, the default is “Perks for taking the quiz”
- on the Thank you page, the default is “Your perks”
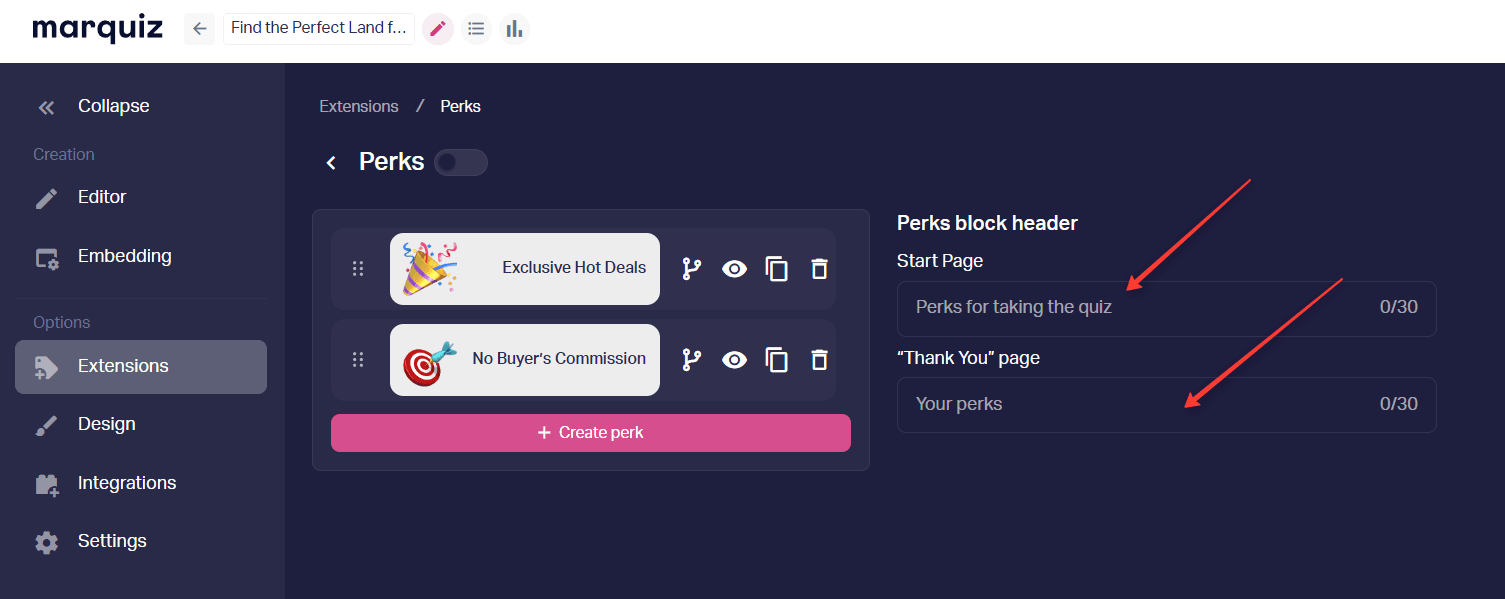
8. If there are several perks, open the Perks block on the Start page and change the settings in the sidebar: choose which perks to show and drag them to change their order.
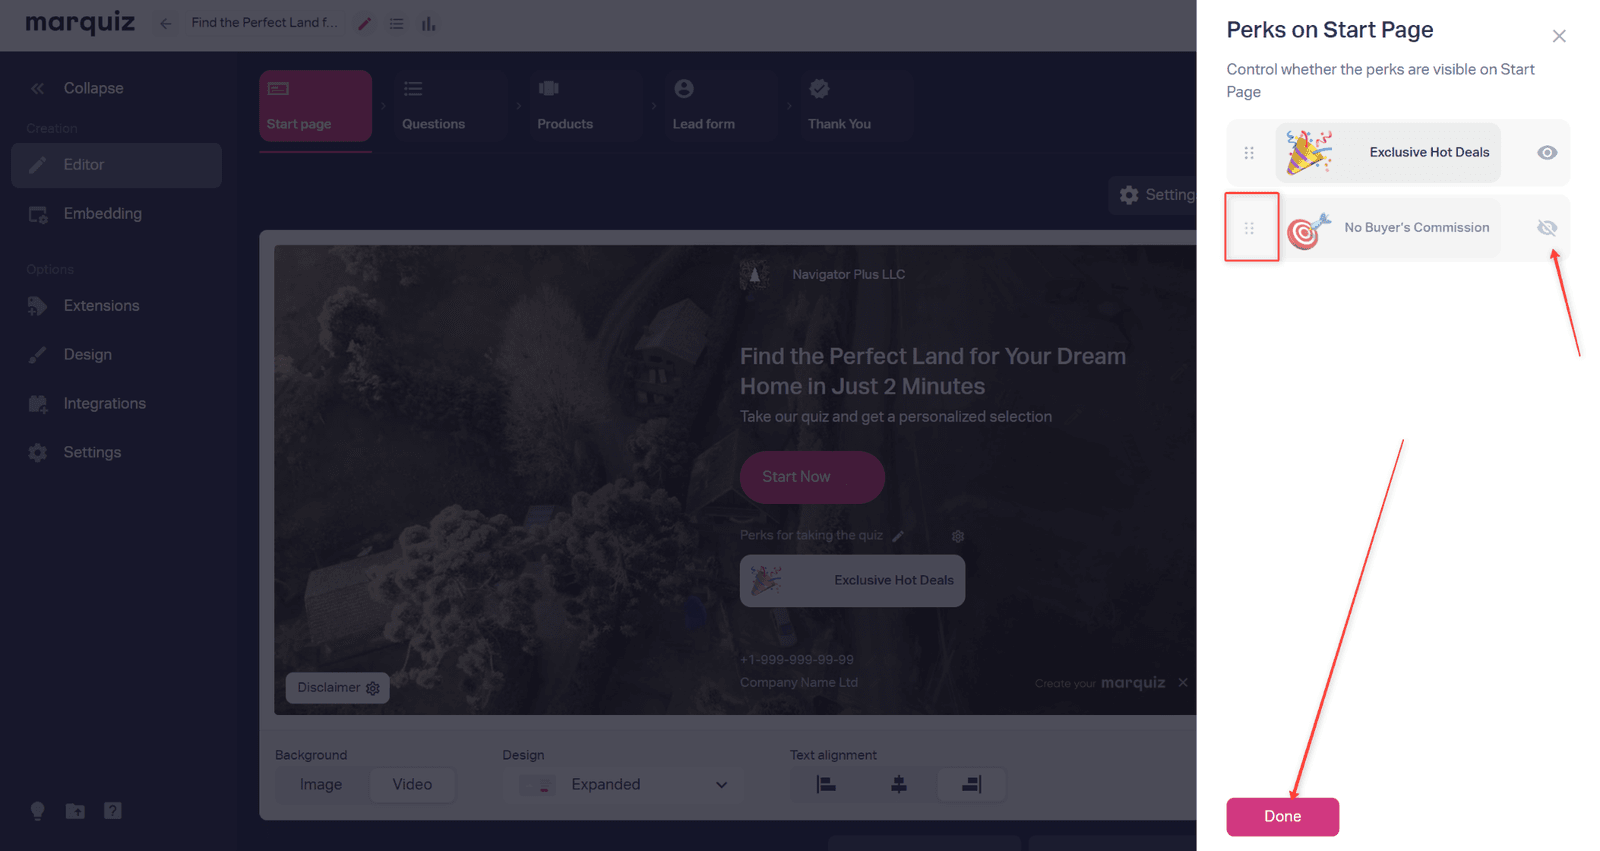
If a perk is hidden on the Start page, this only affects whether it is displayed there. On other quiz stages it still works according to its conditions.
How to show a perk based on an answer
You can show a perk only to people who chose specific answers.
9. Go to Extensions → Perks.
10. Click the branching icon.
11. Set the display condition and choose which answers make the perk available.
12. Save the settings.
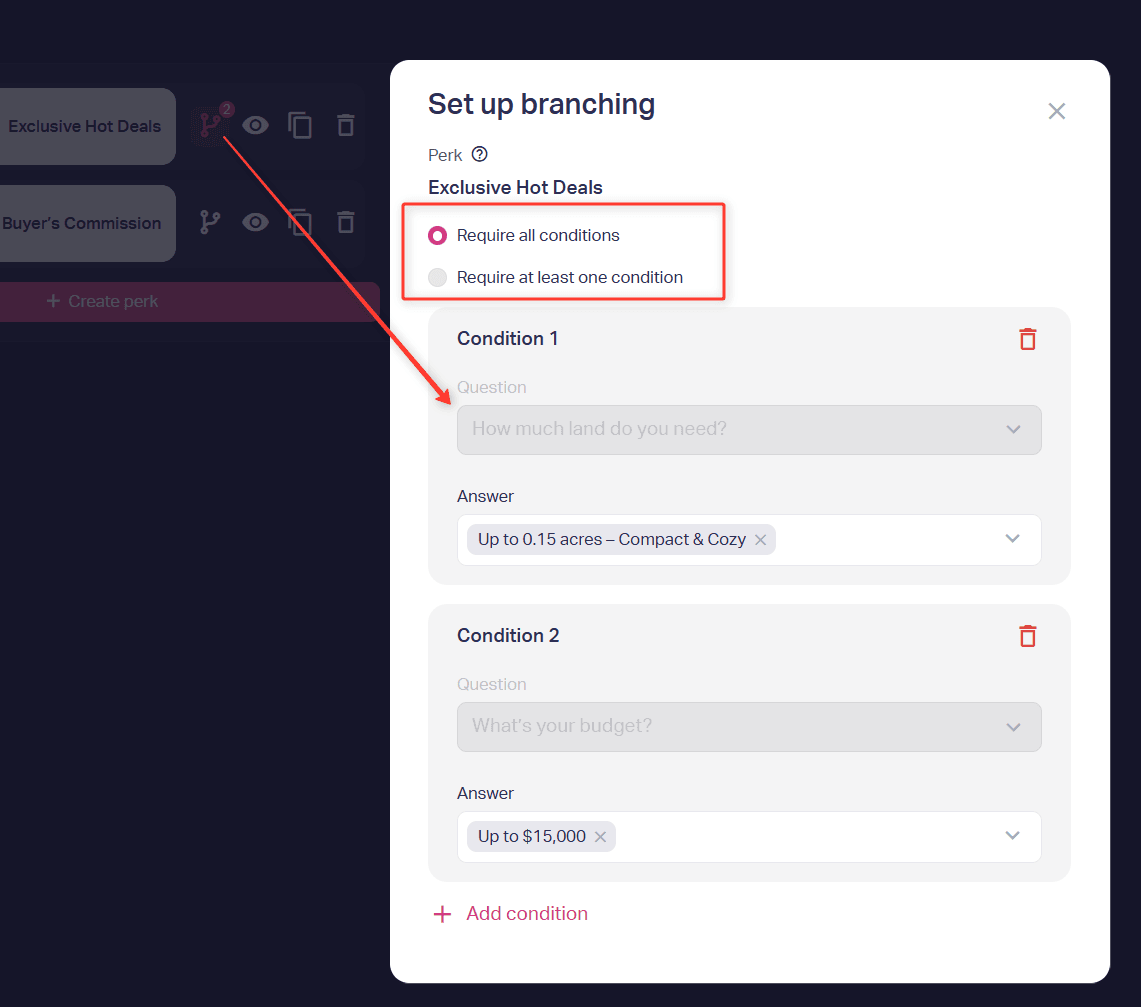
For example:
- The visitor chose “For business” — show the free consultation perk
- The visitor chose “For myself” — show the 10% discount perk
If a perk has display conditions, you can see the number of conditions next to it.
If branching is not set for a perk, it works as a regular one and is shown according to the general perk settings.
You can use perks with and without conditions at the same time. In that case, perks without conditions appear right away, and a perk with a condition appears after the visitor meets that condition.
How conditional perks work in a quiz
If you plan to give different perks for different answers, set the condition through branching.
When the visitor chooses the right answer:
- the perk is marked as earned
- it becomes available at the stage selected in “When will perks be available?”
- the perk may move to the top of the list
If the condition is not met, the perk is not shown on the Thank you page.
Important: First choose when the perk will be available. Set a condition only if the perk is not meant for every visitor.
That’s it. The visitor can open the link or download the file. If branching is set, only people who chose the right answer will see the perk.
You can send the perk by email together with the result. The instructions are provided in this article: How to send results to the client’s email.
You can also set up a discount in the quiz. See the full guide in Discounts in a quiz.